Deployment of VMware Unified Access Gateway (UAG) on AWS as EC2 instance
In this post, I’ll provide guidance on how to Deploy VMware Unified Access Gateway in AWS Amazon Native VPC as EC2 instance.
Before we proceed, currently UAG FIPS is only supported on the vSphere environment to all other deployment such as AWS and Azure needs to have non-FIPS deployment.
Create your AMIs for Unified Access Gateway:
1. Make sure you have downloaded the OVA of Unified Access Gateway version 3.5.x from myvmware.com download page.
2. Extract the ova file to your local machine with 7zip or any software you have. In my case, I am extracting OVA under “C:UAG” folder of my local machine.

3. Login to your Amazon AWS account from web browser > Create an Access Key and obtain the Access Key ID and Secret Access Key.
4. Run Windows PowerShell on your local machine with Administrator privilege.
5. Execute below command to install AWS PowerShell module on your machine.
Install-Module -Name AWSPowerShell -Force
Install-Package 7Zip4PowerShell
6. Set your AWS Credential in the default profile.
Set-AWSCredential -AccessKey AKIAI6428NKYOAME -SecretKey bvfhkvvfhsbvhsdbhfbvfhfhvfhdskvbhfvbfhAME -StoreAs default7. Set your default AWS region (optional)
Set-DefaultAWSRegion -Region ap-northeast-18. Verify your default AWS region (optional)
Get-DefaultAWSRegion9. Create a bucket in Amazon S3 to store UAG .vmdk image if one doesn’t already exist.
$bucket="vmw-uag"
New-S3Bucket -BucketName $bucket -Region ap-northeast-1
10. Create an IAM role in Amazon AWS called “vmimport” and apply a policy to the role.
$importPolicyDocument = @"
{
"Version":"2012-10-17",
"Statement":[
{
"Sid":"",
"Effect":"Allow",
"Principal":{
"Service":"vmie.amazonaws.com"
},
"Action":"sts:AssumeRole",
"Condition":{
"StringEquals":{
"sts:ExternalId":"vmimport"
}
}
}
]
}
"@
New-IAMRole -RoleName vmimport -AssumeRolePolicyDocument $importPolicyDocument
$bucket="vmw-uag"
$rolePolicyDocument = @"
{
"Version": "2012-10-17",
"Statement": [
{
"Effect": "Allow",
"Action": [
"s3:GetBucketLocation",
"s3:GetObject",
"s3:ListBucket"
],
"Resource": [
"arn:aws:s3:::$bucket",
"arn:aws:s3:::$bucket/*"
]
},
{
"Effect": "Allow",
"Action": [
"ec2:ModifySnapshotAttribute",
"ec2:CopySnapshot",
"ec2:RegisterImage",
"ec2:Describe*"
],
"Resource": "*"
}
]
}
"@

Write-IAMRolePolicy -RoleName vmimport -PolicyName vmimport -PolicyDocument $rolePolicyDocument
11. Upload *.vmdk image into the S3 bucket.
$vmdkImage="euc-unified-access-gateway-x.y.0.0-12345678-system.vmdk"
$bucket="vmw-uag"
$region="ap-northeast-1"
$params = @{
"BucketName"=$bucket
"File"="C:uag"+$vmdkImage
"key"="/"+$vmdkImage
"Region"=$region
}
Write-S3Object @params
12. Import EC2 Snapshot.
$params = @{
"DiskContainer_Format"="VMDK"
"DiskContainer_S3Bucket"=$bucket
"DiskContainer_S3Key"=$vmdkImage
"Region"=$region
}
$impId=Import-EC2Snapshot @params
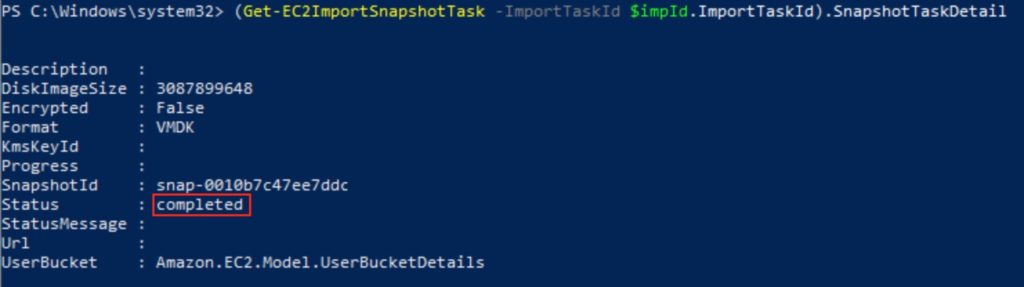
13. You can check the upload progress with below command.
(Get-EC2ImportSnapshotTask -ImportTaskId $impId.ImportTaskId).SnapshotTaskDetailNote: It may take sometime to create the snapshot. Confirm the status is showing as completed.
14. You can confirm snapshotID with below command.
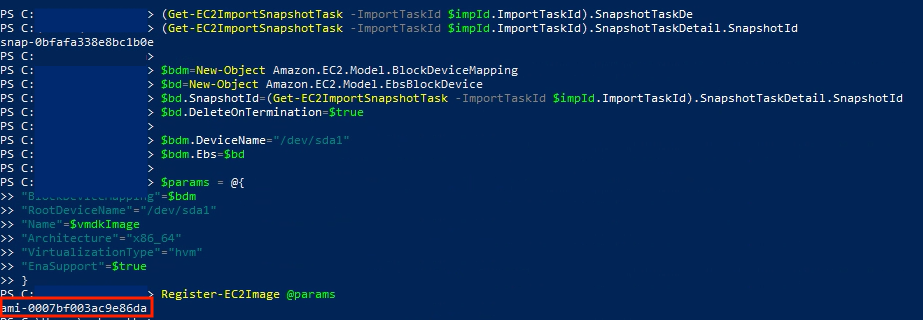
(Get-EC2ImportSnapshotTask -ImportTaskId $impId.ImportTaskId).SnapshotTaskDetail.SnapshotId15. Register the UAG image as an Amazon Machine Image (AMI)
$bdm=New-Object Amazon.EC2.Model.BlockDeviceMapping
$bd=New-Object Amazon.EC2.Model.EbsBlockDevice
$bd.SnapshotId=(Get-EC2ImportSnapshotTask -ImportTaskId $impId.ImportTaskId).SnapshotTaskDetail.SnapshotId
$bd.DeleteOnTermination=$true
$bdm.DeviceName="/dev/sda1"
$bdm.Ebs=$bd
$params = @{
"BlockDeviceMapping"=$bdm
"RootDeviceName"="/dev/sda1"
"Name"=$vmdkImage
"Architecture"="x86_64"
"VirtualizationType"="hvm"
"EnaSupport"=$true
}
Register-EC2Image @params
Note: If AMI import succeeded, you will see the AMI number as highlighted in red below.
16. Go to your AWS console > AMIs and confirm your AMI exists in list.
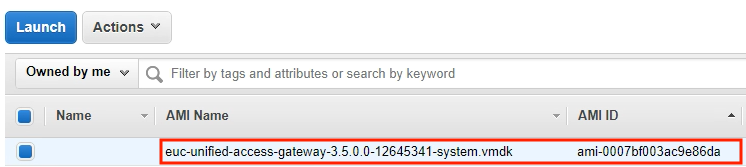
17. Go to your AWS console > EC2 Service > Lunch Instance > My AMIs. You should see your AMI is available for EC2 deployment.

Deploy UAG from your AMI:
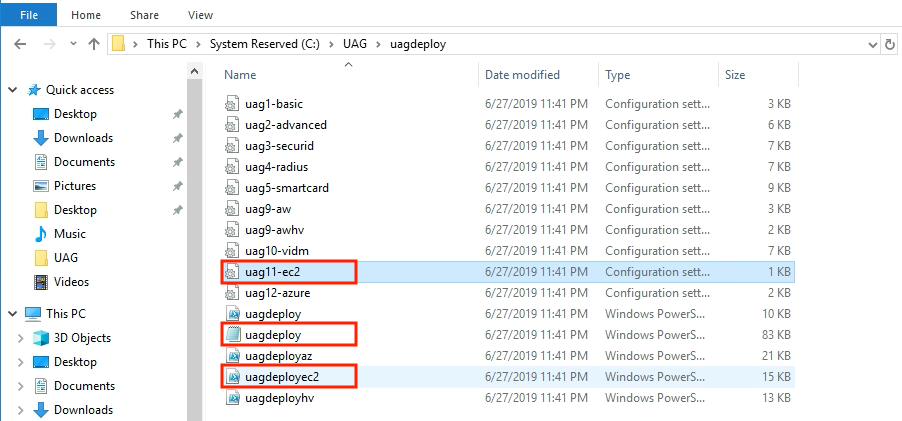
Download the uagdeploy PowerShell script zip file from myvmware.com download page and extract it. Zip file consists the scrip for vmware and azure deployment as well. You will see the files like below. You will need “uag11-ec2.ini”, “uagpeploy.psm1” and “uagdeployec2.ps1”.
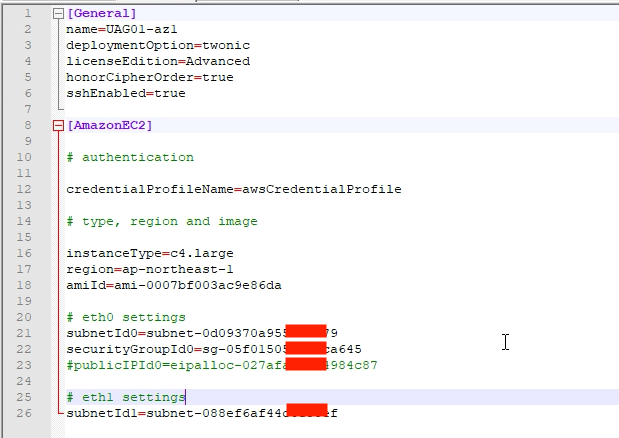
18. Open uag11-ec2.ini file in text editor and modify it matching the UAG parameters with your AWS environment and your requirement. Below is ini file (uag1.ini) I am using to deploy UAG with 2 nics in my AWS environment.
19. Once you get ready with your .ini file, run Windows PowerShell on your local machine with Administrator privilege and set your AWS Credential in default profile if you have not done yet.
Set-AWSCredential -AccessKey AKIAI6428NKYOAME -SecretKey bvfhkvvfhsbvhsdbhfbvfhfhvfhdskvbhfvbfhAME -StoreAs default20. Execute below PowerShell scrip.
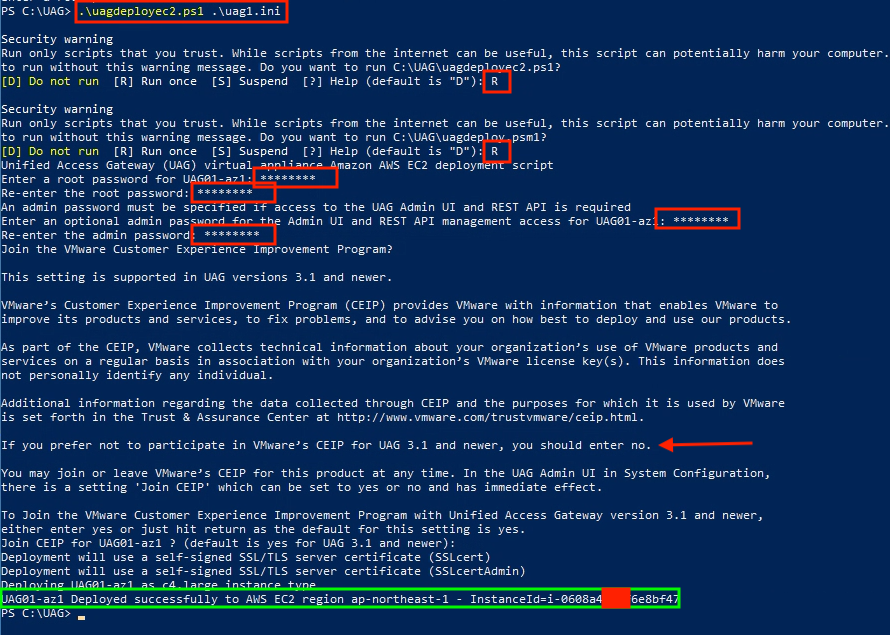
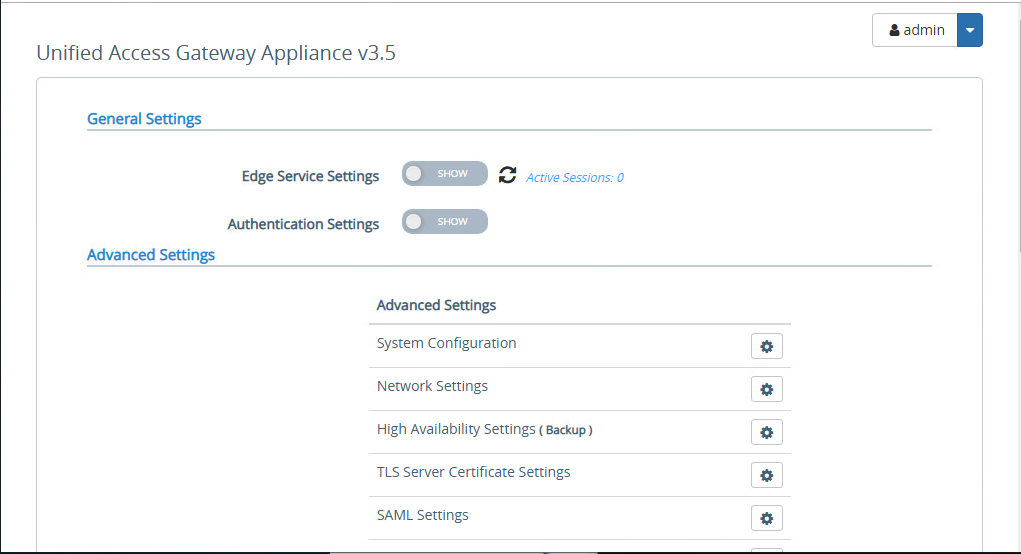
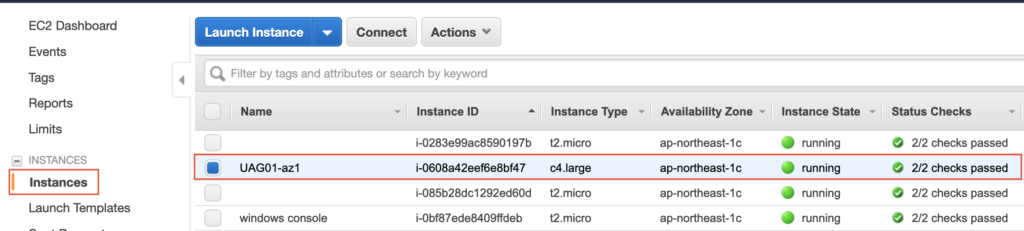
21. Login to AWS console and confirm “uag01-az1” is deployed successfully and Instance Status is showing as “running”.
22. Login to UAG admin console on web-browser with https://uag-ip or dnsname:9443/admin and proceed the configuration according to your requirement.