As Horizon 7.7 just released last week, one of the features my customer often asked me about customizing horizon view default screen for enterprise logo and background.
I think it is a nice visual to add some simple branding to the default Horizon landing and portal pages and it is relatively straightforward to accomplish.
Let’s start with the default screens and elements.
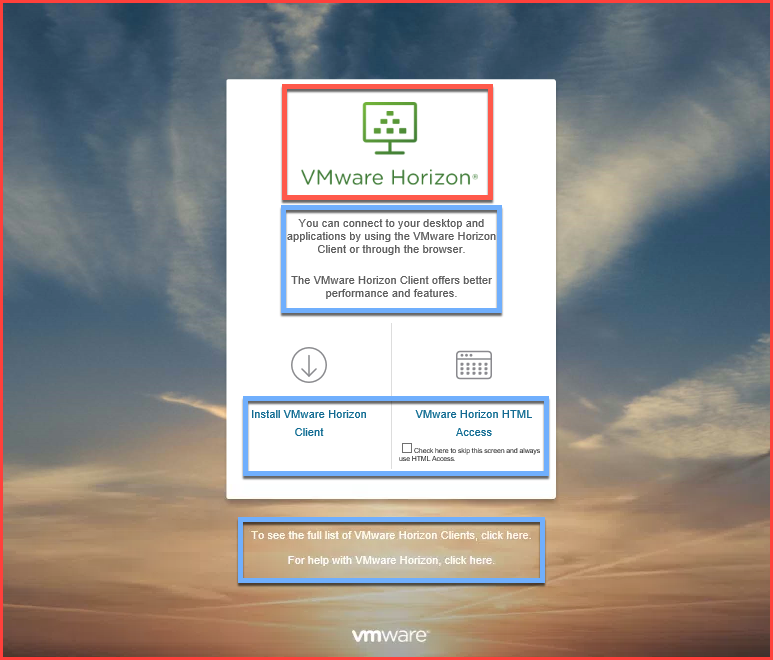
Landing Page
HTML Portal Page
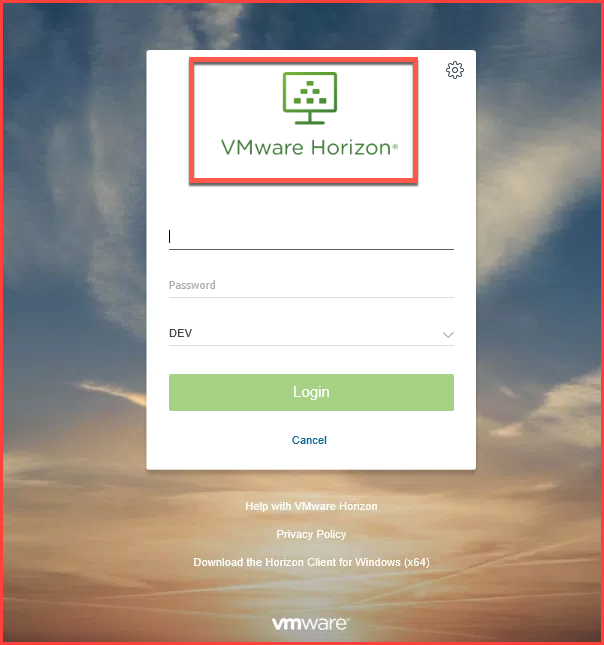
I’ve marked the images we are going to change in red and the text that we can change in blue.
Hopefully it goes without saying to backup all files or the connection server(s) before making any changes!
The table below shows where the images on the default screens are located on the Connection Server.
The image directory name changes with every release but location is the same.
| Horizon Version | Icons Image Directory |
| 7.0 | C:\Program Files\VMware\VMware View\Server\broker\webapps\portal\webclient\icons |
| 7.1 | C:\Program Files\VMware\VMware View\Server\broker\webapps\portal\webclient\icons |
| 7.2 | C:\Program Files\VMware\VMware View\Server\broker\webapps\portal\webclient\icons-5622958 |
| 7.3 | C:\Program Files\VMware\VMware View\Server\broker\webapps\portal\webclient\icons- |
| 7.4 | C:\Program Files\VMware\VMware View\Server\broker\webapps\portal\webclient\icons-7361877 |
| 7.5 | C:\Program Files\VMware\VMware View\Server\broker\webapps\portal\webclient\icons-8436628 |
| 7.6 | C:\Program Files\VMware\VMware View\Server\broker\webapps\portal\webclient\icons-9505036 |
| 7.7 | C:\Program Files\VMware\VMware View\Server\broker\webapps\portal\webclient\icons-10935101 |
I have found the quickest and easiest results to be had by replacing the following 3 image files with branded images of the same image size.
| Image | Filename | Image Size |
| Horizon Logo | Logo@2x.png
Logo.png |
472×222
240×113 |
| Background | BG_image.jpg | 2560×1440 |
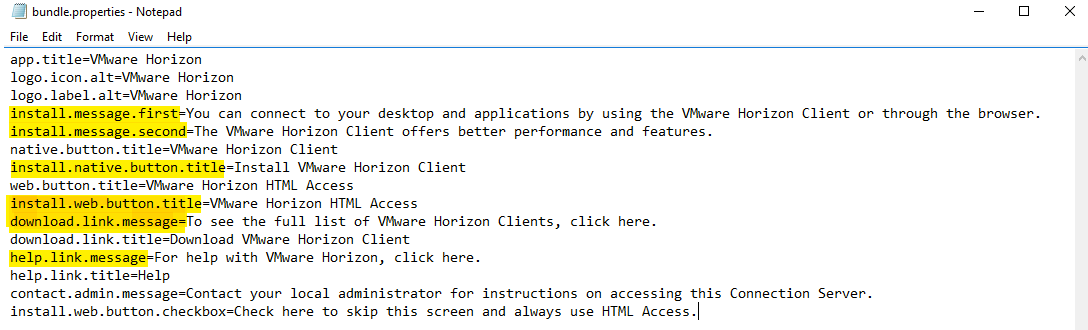
The text marked in blue on the default screen can be found in the following location
C:\Program Files\VMware\VMware View\Server\broker\webapps\portal\WEB-INF\classes\com\vmware\vdi\installer\i18n\bundle.properties
Edit the appropriate text and save the file.
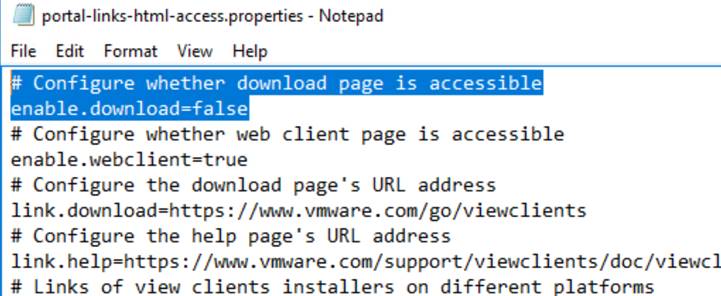
Do not pass go and head directly to HTML portal page
If you want to skip the landing page and have users hit the portal page directly, which is a useful feature, make a change in the following file
CommonAppDataFolder\VMware\VDM\portal\portal-links-html-access.properties
Change the top line to disable the download
Once you are happy with all your changes restart the connection service and refresh your browser to apply them (you may need to clear the browser cache if you are not getting the desired results).
It should be noted that these customizations will not persist through an upgrade and will have to be recreated..;)